• Welcome to https://albinowners.net, the new home of Albin Owners Group!
• You will need to log in here, and you may want to bookmark this site. If you don't remember your password, use the I forgot my password link to reset it.
• All content has been transferred from our previous site.
Contact Us if you have any questions or notice a problem. If you're not receiving our email, include a phone number where we can text you.

A27- Head modification

Albin's "power cruisers"
Post Reply
User avatar
JT48348
First Mate
First Mate
Posts: 755
Joined: Sun Jul 27, 2014 11:38 am
Home Port: Detroit
Contact:

Re: A27- Head modification

Post by JT48348 »

Jay Knoll wrote:Does the bulkhead hit the overhead just aft of the hatch?
no interference with the hatch.

I've pretty much decided on a full remodel. So I will be looking at the galley down the road. It would be nice to have the fridge on the galley side, but I'm not seeing the room right now. Is anyone else using a fridge and if so which one?
Last edited by JT48348 on Thu Sep 04, 2014 10:02 am, edited 1 time in total.
Jay Knoll
Gold Member
Gold Member
Posts: 475
Joined: Wed Aug 04, 2010 11:21 am
Home Port: Vero Beach FL

Re: A27- Head modification

Post by Jay Knoll »

Pics of hardtop for JFOkie

Much to my surprise I don't have any with her new name! Here she is sitting up in the Chesapeake when we went up for a sea trial. She has now been renamed "Better Days. JF, we don't miss the open cockpit at all, down here in FL we try to stay OUT of the sun as much as we can. There is a sister ship in a yacht club right new our slip who has a full cockpit Bimini. He is lusting after our hardtop, he says it is noticeably cooler in our cockpit compared to his.
You do not have the required permissions to view the files attached to this post. To view images, please register for a free account.
User avatar
JT48348
First Mate
First Mate
Posts: 755
Joined: Sun Jul 27, 2014 11:38 am
Home Port: Detroit
Contact:

Re: A27- Head modification

Post by JT48348 »

Spent the weekend winterizing the engine, and inspecting the head systems.

My water tank is cracked, so I am working to remove it. Anyone have any advice on that? Looks like gray plastic.

The tank takes up the entire space on the port side engine compartment. I have emptied it but I don't think it will fit anywhere coming out. I am considering cutting it in pieces to remove it.

Also, in the hanging locker there is a gray metal box thing with what looks like radiator baffles, and black slinky vent houses 3"-4" wide. Is this some sort of heater from the engine compartment?
User avatar
tego
Gold Member
Gold Member
Posts: 451
Joined: Thu May 09, 2013 2:22 pm
Home Port: Tellico Marina- Little Tennessee River near Vonore, TN
Location: Maryville, TN

Re: A27- Head modification

Post by tego »

Jay, I really like the hardtop. Could you post some more pics of the underside too? I have been planning on one of these, maybe making it this winter in my shop.Thanks, Ben
User avatar
JT48348
First Mate
First Mate
Posts: 755
Joined: Sun Jul 27, 2014 11:38 am
Home Port: Detroit
Contact:

Re: A27- Head modification

Post by JT48348 »

I second that. As many photos as you can from different angles and how you mounted and attached it, if you please. I love the way it looks

Dimmensions?
eseyoung
Gold Member
Gold Member
Posts: 177
Joined: Thu Oct 03, 2013 11:44 am
Home Port: Marathon, FL

Re: A27- Head modification

Post by eseyoung »

Joe, the radiator looking thing is an heater. Its plumbed into the freshwater side of the engine cooling. It's control switch is the round twisty switch between the glove box and the dash. There is a cockpit vent below the glove box. The switch is a little weird. All the way to the left is actually low. One click to the right is off.

I takes the chill out of the cockpit and berth with the bulkhead curtain. I doubt it will do much to heat with the full camper top on.
don123
First Mate
First Mate
Posts: 221
Joined: Fri Feb 22, 2013 5:12 pm
Home Port: Biloxi MS

Re: A27- Head modification

Post by don123 »

JT48348 wrote:My water tank is cracked, so I am working to remove it. Anyone have any advice on that? Looks like gray plastic.

The tank takes up the entire space on the port side engine compartment. I have emptied it but I don't think it will fit anywhere coming out. I am considering cutting it in pieces to remove it.
I replaced ours with a pair of Todd 15 gallon tanks paralleled together in the original space. They are each about 24 by 10 by 15 inches

I too am interested in the hardtop pictures - I'm in the process of installing one now, but mine is a bit different. I'm extending the existing hardtop aft so it's all one piece and when finished, it will look like the boat came that way from the factory. I think mine is a bit more heavy duty, as it's designed so I can sit my 8' fiberglass dink with a 6 HP outboard up there using an electric crane

Don
Jay Knoll
Gold Member
Gold Member
Posts: 475
Joined: Wed Aug 04, 2010 11:21 am
Home Port: Vero Beach FL

Re: A27- Head modification

Post by Jay Knoll »

Hi Guys, here are some pics, I'm going to send them in a couple of posts, I tried to do them all at once an the site froze on me.

I didn't build the hardtop it was on the boat when I bought it. Sorry for the grubby pics, she needs a scrub!

It is really strong, there have been two big guys walking around on it, before the solar panels were installed

I'm planning on putting in another support near the aft end of the cockpit, on the foward corner of the aft cabin. It is tricky going aft with the curtain down, there isn't anything to hang on to to get yourself out of the cockpit and on to the deck where you can use the grab rails. It will be safer to have that post to grab onto.

I didn't have a tape with me but you can see that the aft end goes all the way back to the end of the aft cabin truck. The width follows the cockpit's dimensions, there is a taper.
You do not have the required permissions to view the files attached to this post. To view images, please register for a free account.
Jay Knoll
Gold Member
Gold Member
Posts: 475
Joined: Wed Aug 04, 2010 11:21 am
Home Port: Vero Beach FL

Re: A27- Head modification

Post by Jay Knoll »

More pics
You do not have the required permissions to view the files attached to this post. To view images, please register for a free account.
Last edited by Jay Knoll on Mon Aug 25, 2014 5:33 pm, edited 1 time in total.
Jay Knoll
Gold Member
Gold Member
Posts: 475
Joined: Wed Aug 04, 2010 11:21 am
Home Port: Vero Beach FL

Re: A27- Head modification

Post by Jay Knoll »

last batch
You do not have the required permissions to view the files attached to this post. To view images, please register for a free account.
User avatar
JT48348
First Mate
First Mate
Posts: 755
Joined: Sun Jul 27, 2014 11:38 am
Home Port: Detroit
Contact:

Re: A27- Head modification

Post by JT48348 »

That is really sweet. Can you tell what its cored with or made of. How thick would you say Looks there is a slight camber that hatches original top. The supports look like 1" stainless?
User avatar
JFOkie
Gold Member
Gold Member
Posts: 107
Joined: Sun Jan 29, 2012 6:23 pm
Home Port: Dover, NH
Location: Dover, NH

Re: A27- Head modification

Post by JFOkie »

Jay,

Thanks for the pictures. I would love to extend the hardtop, but it will be awhile before I can take on a project like that; not enough free time. I need to replace my water tank, there is a build up of something on the bottom that makes the water smell......I've tried everything to try and clean it. My guess is that it's sediment built up over the years.

Please continue sharing pictures of your ongoing project.......especially with the winter coming on soon up here in NH. Before I know it the boat will be hauled out, it will get cold, the damn snow will fall and I will be miserable. This forum keeps me going through the winter!

Regards,
John
M/V Nirvana
don123
First Mate
First Mate
Posts: 221
Joined: Fri Feb 22, 2013 5:12 pm
Home Port: Biloxi MS

Re: A27- Head modification

Post by don123 »

Jay Knoll wrote:Hi Guys, here are some pics . . .
Jay,

If you could take a close-up of the nice Albin 27 graphic on the side of your boat and post it here, I'd be forever grateful - I could send that to my vinyl sign guy and have him make me a pair of them for my boat. Mine were long gone when I bought the boat. Some approximate dimensions would be helpful too

I've bought several sets of graphics from a guy in New York for the car and the boat - If anyone else needs a set of these, I could have him make several more . . . . let me know

Thanks,

Don
Jay Knoll
Gold Member
Gold Member
Posts: 475
Joined: Wed Aug 04, 2010 11:21 am
Home Port: Vero Beach FL

Re: A27- Head modification

Post by Jay Knoll »

IMG_2243.JPG
HI Guys

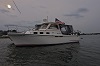
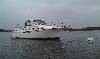
Regarding the hardtop. It does have a camber to it, I really hadn't considered that fact until I was installing the solar panels, if you look carefully you'll see a slight gap between the base of the standoff and the hardtop. Not a big deal everything is secure and a bit of caulk will make it look OK.

The supports are 1" stainless. I think that the core is ply, at least when I drilled the holes for the grab rails I got sawdust falling into the cockpit. I forgot to measure the thickness, going to be away from the boat for awhile so I'll have to get back to you on that.

Here is a pic of the Albin logo I messed up on measuring, sorry I only measured the distance from the "A" to the "n". That is 12", I guess if you get it to print out at that size you can measure the rest of the dimension.

If you look at the pic you'll see that my logo is pretty crazed, so Don if you're going to have some made add 2 for me to the order. Thanks

Jay
You do not have the required permissions to view the files attached to this post. To view images, please register for a free account.
User avatar
JT48348
First Mate
First Mate
Posts: 755
Joined: Sun Jul 27, 2014 11:38 am
Home Port: Detroit
Contact:

Re: A27- Head modification

Post by JT48348 »

Removing the old water tank:

Old hot water heater, rusted, removed. I had to remove the starboard aft cabin bulkhead to be able to get it out. Good thing I did, solid rust bucket.

Next came the3 old water tank which was cracked. A sawsall made short work of the plastic tank. Had to cut in several places, and fold or bend it on itself to eventualy get it out in pieces. To cut it out I kneeled on the starboard side of the engine, leaned across engine and cut into the side with the sawsall. Took about twenty minutes to cut it out. Good thing I did, not only was it cracked but scummy, moldy, and quite a bit of sedament in the bottom. Probably the original water tank. Reads 40gal. The resulting space is very nice. Plenty of room. Needs a good cleaning. Photos attached.
You do not have the required permissions to view the files attached to this post. To view images, please register for a free account.
Post Reply

Return to “A25 / A27 - True Classics”